I finally cut out all of my pages and am ready to begin! So where to start...thought I'd do the obvious and start with "A." A is for Animals.
Materials:
- Sky blue background (duck canvas 10.5"x12")
- Iron-on "A"
- Iron-on dark T-shirt Transfer Sheet for Ink Jet Printers (I used June Tailor)
- Green and brown felt
- Black embroidery thread
 |
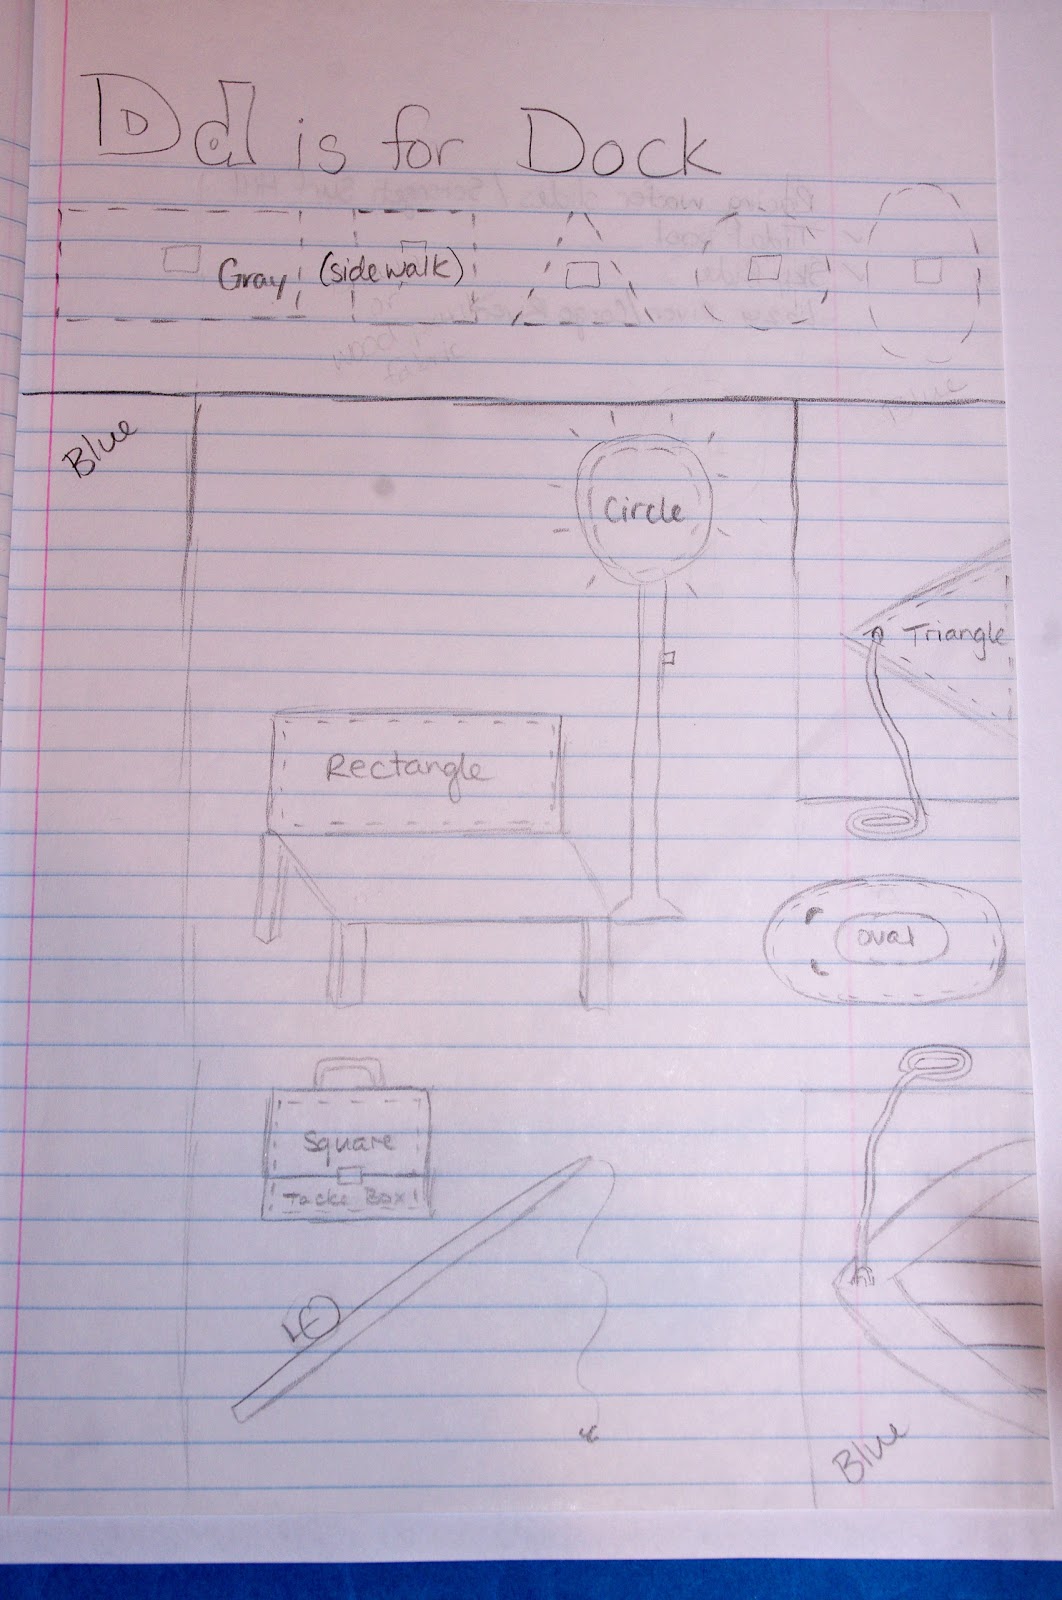
| The original design |
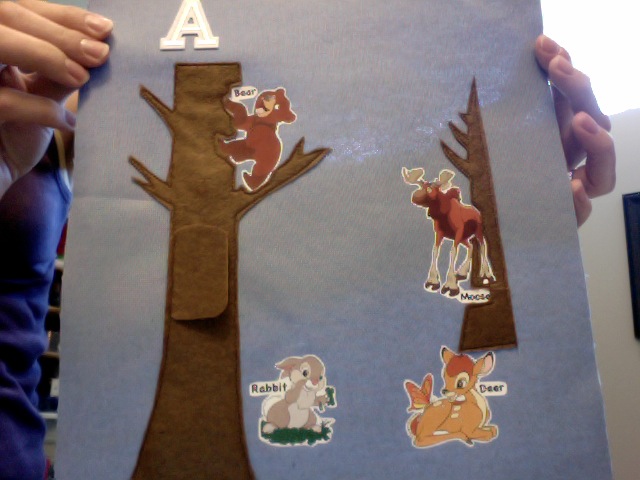
For this page I wanted to make a lift-the-flap page. I decided it'd be too difficult to draw each of the animals I have decided to use (moose, bear, deer, rabbit and squirrel), so instead I found pictures of the animals on the Internet using Google Images and am putting them onto the page using Iron-On Dark T-shirt Transfer.
To do this, I used Microsoft Word to resize and adjust the pictures so that they all fit on one page and they were the size that I wanted them to be for the book. I then added text boxes with the names of each animal. I printed them out on the transfer sheet and followed the directions to adhere them to the background page, making sure I put them where I wanted them to go (leaving space for the seam allowance). I also ironed the "A" on while I was at it.
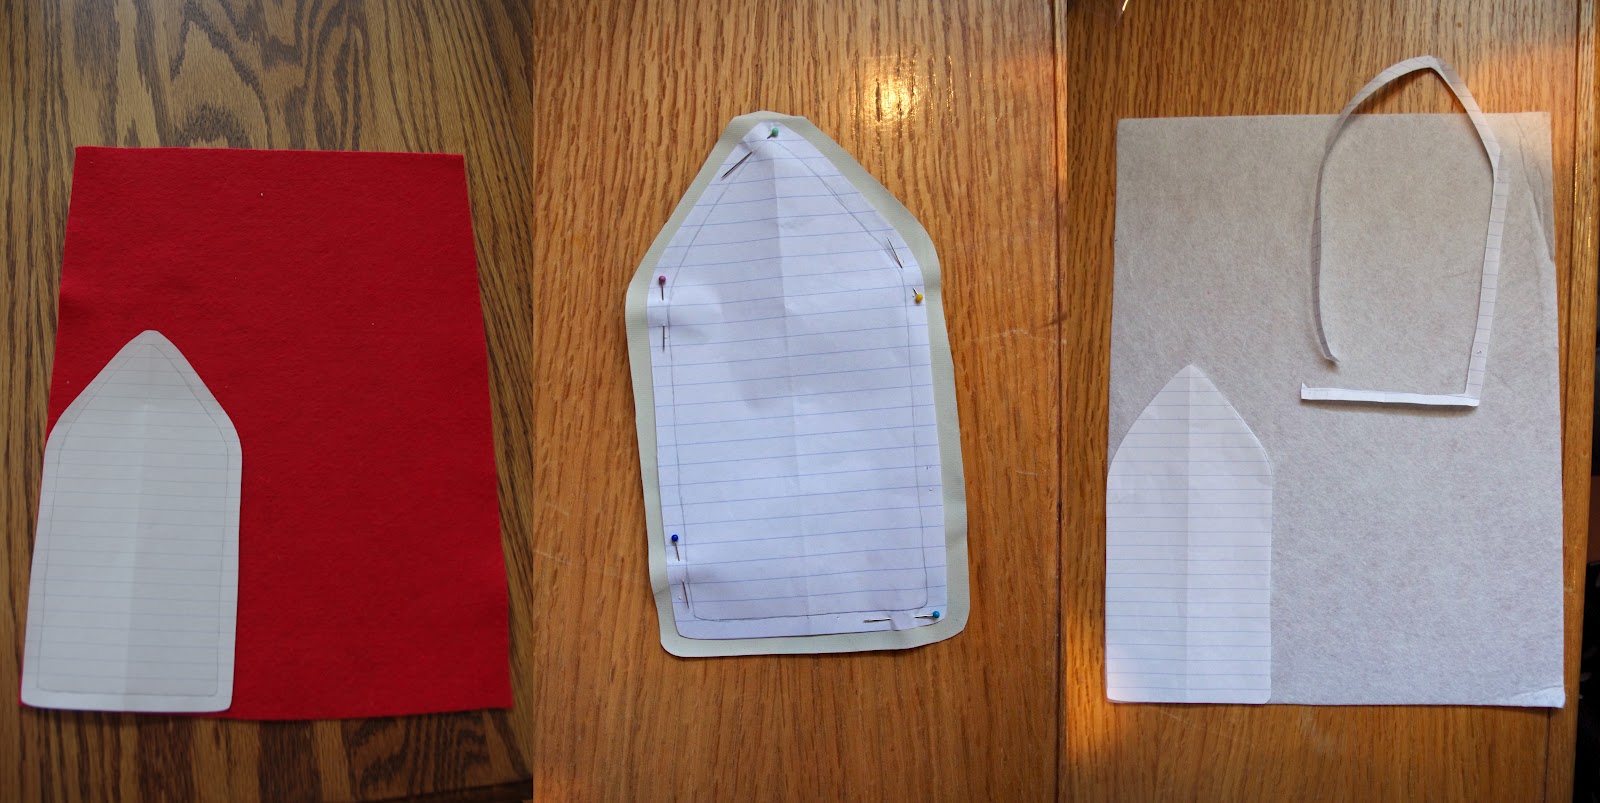
My next step was to cut out the shapes that would hide the animals. To do this I took notebook paper and covered the page. I pressed down so that I could see the animals through it and lightly drew the basic shapes of the trees and bushes to hide the animals. Warning: I'm a perfectionist, so I traced exact holes for the squirrel, bear feet, and moose to fit into the trunk.
I then retraced the green pieces and the brown pieces on to separate pages so that I could cut them out to use as patterns. **After doing this I decided to extend the squirrel's tree trunks so it didn't look like it was sprouting out of thin air! Also note that I completed the pine tree limbs that are cut off as well as continuing the other tree's "leaves" past where the page ended.
Next I cut out the material (green and brown felt), pinned, and sewed the brown trunks in place. I made sure that the brown flap covering the squirrel was sewn into the outer trunk seam.
Then, before I sewed the green pieces on, I stitched around each to help the felt keep it's shape and because I think it gives it a more finished look.
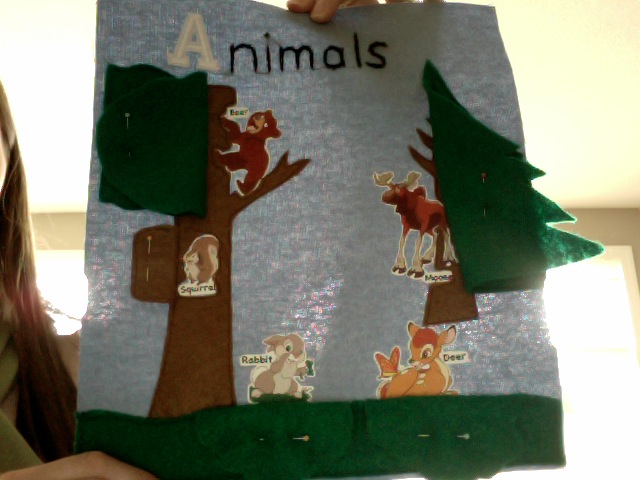
I sewed the tree foliage on first, making sure that the animals were covered completely, but could be seen when the flaps were lifted. Then I sewed the bottom of the grass in place before adding the bushes.
I made sure that the bottoms of the bushes were sewn in completely with the top seam for the grass so that they'd flip down to reveal the rabbit and deer. The finishing touch was a quick stitch around the "A" to make sure it stays down, and hand-stitching "nimals" using black embroidery thread and the chain stitch. (I used a pencil to lightly trace out the letters before stitching. Sewing chalk would be better, but I didn't have any on hand!)
The finished product! Now, being a perfectionist, I DID notice that the moose appears to be standing on thin air. I think I'm just going to have to live with it this time. Not sure it's worth adding a hill or mountain...
**Okay, so I couldn't sleep last night...which means, yes, a hill was created for the moose. HERE is the final "A" page: